Are you looking for a comprehensive guide on how to install a window air conditioner?
If so, you’ll find everything you need here.
This post offers step-by-step instructions on how to install window AC so you can get your new unit up and running in no time.
The process is not rocket science either. It’s actually a fairly quick job that won’t take up much of your time or require any special knowledge.
By following the steps in this guide, you’ll be well-prepared to install any size window air conditioner.
We’ll first go over the benefits of this types of appliances, then move onto the installation process for double-hung and casement windows, followed by sliding windows, and end with how to install a window air conditioner in a wall.
So, let’s get started.
Window Air Conditioner Benefits
If you haven’t quite decided on whether installing a window air conditioner in your home is the right thing to do, then this section is for you.
If you’ve already bought your window air conditioner and just want the steps for installation, you can skip this part of the guide.
Window air conditioners are undoubtedly one of the most popular and recognizable types of AC units out there. And for many people, these devices have become the go-to cooling systems for their bedrooms, living rooms, and even the entire house.
Why is that?
Well, window air conditioners have loads of benefits, and these days they really give central air conditioners a run for their money.
Here’s a quick overview of some of the top advantages of owning a window air conditioner:
- Affordability — One of the best things going for window AC units is that you don’t need to invest several thousand dollars to get one. It’s quite possible to get a premium-quality model for as little as a few hundred dollars. What’s more is that these devices don’t cost much to each month either. You can pay as little as $20 to keep the main area of your home cool for eight hours per day.
- Energy Efficiency — Nowadays, most modern window AC units have remarkable EERs (Energy Efficiency Ratios). EER refers to the amount of energy that an air conditioner uses to adequately cool a space. In short, this means that your window AC unit will deliver colder air for a lower cost.
- Easy Installation — These appliances differ from other common cooling systems like central air conditioning in the sense that you don’t have to be an HVAC expert to install them. It’s a pretty straightforward process that most anyone can do, even without any prior experience or knowledge.
- Good for Any Room— Window air conditioners can be installed in any room of the house. Some people consider them to be the best bedroom air conditioners for their needs while others use them as a way to keep their living room, home office, or other common room in the house cool.
To find the perfect window air conditioner for your needs, check out our top rated window air conditioners page. It includes the best models you can buy for each size room.
How To Install A Window Air Conditioner
Materials Needed
Here’s a checklist of the things you’ll need to have on hand before installing a window air conditioner:
- The window AC unit
- Measuring Tape
- Screwdriver
- Drill and drill bits
- Insulating foam strips
- Angle brackets and screws (in case your unit doesn’t come with them)
- Weatherstrip (optional)
- Knife
- Another person who can assist you
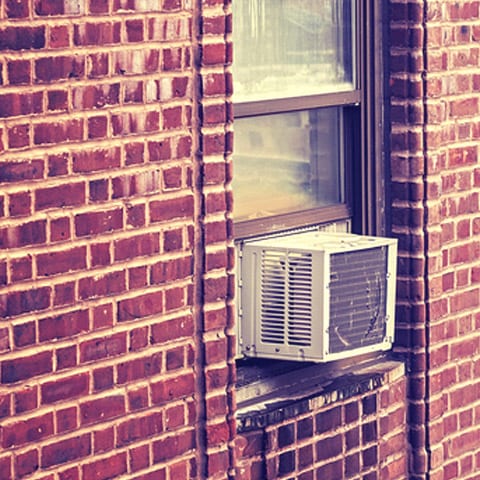
Step 1: Choose a Window
The first step for how to install window AC units is to identify the window in your home where you’d like the appliance located.
Then, measure the width of the window and the width of the air conditioner to make sure that the unit will fit.
If the window is too large, don’t worry, because each window AC unit comes with an accordion panel to fill in the gap.
If the window is too narrow, you’ll need to buy a smaller window AC unit.
Also, window air conditioners come in two versions: one for double-hung windows and another for casement windows. The units are not interchangeable and you’ll need to make sure that you have purchased the correct version for the type of window you’re going to install it in.
Step 2: Putting Your Window AC Unit Together
Once you’ve got your window air conditioner in hand, it’s time to set it up.
Carefully take out all of the parts from the box and assemble the unit as outlined in the instruction manual
Most window air conditioners require you to attach additional parts like flanges and accordion-style panels to the unit with screws. If your package already came with screws, use your screwdriver and insert them where needed. If not, you’ll need to purchase these separately before starting the installation process.
Step 3: Inserting the AC Unit in the Window
This step is best performed with the help of a friend or family member since window air conditioners can be heavy.
Open the window you’re going to install the appliance in.
If your AC unit came with a weatherstrip, line it along the windowsill. Although these strips are completely optional, they do help to safeguard your unit from any damage you may incur during installation and removal as well as prevent cold air from escaping.
With the assistance of a partner, lift and place the air conditioner onto the bottom of the window frame. Then, slide it backwards until the top flange is even with the bottom part of the open window.
While your partner is holding the unit in position, proceed to the next step.
Step 4: Lower the Window
Carefully lower the open window sash until it rests comfortably behind the top-most flange of the window AC unit while also ensuring that the bottom flange is fitted securely against the windowsill.
Step 5: Install Angle Brackets
Your unit should have come with either one or two small angle brackets.
These brackets are essential as they lock the two sashes of your window in place to keep the unit from inadvertently falling out of the window.
To install the brackets, place one on each side of the top of the window sash that’s supporting your window AC unit.
One edge of the angle bracket will fit snugly against the inside groove of the window while the other will lay flat on the top of the window sash.
Using your screwdriver and the included screws, screw these brackets into place. If the wood is too tough, you may need to use a drill to create a starting hole and/or tighten the screws down.
Step 6: Seal the Window Gap
The final part of this process on how to properly install a window air conditioner is to create a seal that blocks the gap between the lower and upper sash.
You can do this with a foam insulating strip. Your window air conditioner should have come with one, but in case your unit didn’t, you’ll need to pick one up from your local home improvement store.
Push the strip into the space where the lower window sash meets the upper one. If the strip is too long, use a knife to cut it to the correct length.
Once the foam strip is fitted properly, you’re done with the job of installing a window air conditioning unit.
Now, all you have to do is plug it in and turn it on.
How To Install Air Conditioner in Sliding Window
Although window air conditioners are not meant to be installed in sliding windows, there are some extra steps you can take to make it work.
The trick here is to build a solid frame that will hold the window AC unit in place and cover up the extra space above the appliance.
For this project, you’ll need the following materials:
- (2) 8-foot 2 x 4 pieces of lumber
- (1) Sheet of plywood
- (16) 3-inch screws
- (24) 1 1/4-inch screws
- Drill and drill bits
- Saw
- Screwdriver
Step 1: Measure the Window and AC Unit
The first step in how to install air conditioner in sliding window is to measure both the window opening and the size of your air AC unit.
These measurements are critical because if you don’t get them right then the AC unit may not fit correctly.
Measure the height of the window opening. Take this measurement between the bottom to the top sills.
Measure the width of your air conditioner—including the side vents. They do stick out a bit.
Measure the height of your air conditioner. Don’t include the flanges on the top or bottom.
Step 2: Build the Initial Frame
Using a saw, cut the 2 x 4 pieces of lumber into the following sizes:
- (2) Height of the window opening
- (3) Width of the air conditioner—including the side vents
You now want to build a rectangular frame with these pieces of cut lumber. To do that, follow these steps:
- Lay the 2 longest pieces on the ground parallel to each other and resting on their sides. Then, fit one of the shorter (air conditioner width) pieces between the top to ends (also on its side) and screw them together using a drill and 3-inch screws. Use two screws on either end for a firm hold.
- Take another short piece of lumber and wedge it between the bottom (opposite) end of the two sideboards. Make sure this piece is also on its side and screw it together to finish the frame with two screws on each edge.
You should now have a rectangular frame.
Lift it up and position it inside the window opening to make sure that it fits. If it’s loose, you can use shims to wedge it into place.
Step 3: Finish the Frame
With the initial frame in place, hoist up your window air conditioner and place it into the frame opening.
Move it backward until the top flange is even with the sides of the wood frame. Then, take a pencil and mark a line on each side of the frame to indicate where the top of the window unit with the flange rests.
Remove the air conditioner from the frame.
Remove the frame from the window.
Take the last short piece of lumber and slide it into the middle of the frame while lining it up with the two marks you made on either end of the frame. Then, screw this board in place on both sides using two screws on each end.
Replace the frame in the window.
To keep the frame securely in place, use a drill to put two screws each through the bottom 2 x 4 and top 2 x 4 so it anchors the frame to the window sill.
Lift your air conditioner and slide it back into the frame. The unit should now stay in place after you let go of it since the middle piece of lumber will prevent the air conditioner from falling backward and out the window.
Step 4: Cover the Top of the Frame
At this point, you have an air conditioner installed in a sliding window; however, there’s still a wide opening above the unit.
To fix that, you’ll need to cut a piece of plywood to cover this spot.
Measure the width and height of the opening and transfer those measurements onto a piece of plywood.
Cut the plywood.
Place the plywood over the top opening of the frame and use the 1 1/4-inch screws to secure it in place. About 4-6 screws on each edge should be fine.
Step 5: Paint the Frame (Optional)
If you don’t like the looks of raw wood, you can always prime and paint the frame to match your existing window trim.
This step is optional but one that some people like to do.
You can either do this before securing the frame in place in the window or after the unit has been installed. It’s up to you.
How to Install a Window Air Conditioner in a Wall
Can you install a window air conditioner in a wall?
That’s another popular question.
The truth is, you can’t install a standard window AC unit in a wall because the way these appliances vent hot air is out the sides of the unit.
If you were to install one in a wall, then the hot air would get trapped between your drywall and cause all sorts of problems.
The solution here is to buy a specific air conditioner that’s meant for wall installation, called a “through the wall air conditioner”.
Through the wall air conditioners looks identical to window AC units except for the fact that their hot air vents are located on the back of the appliance. This allows hot air to escape freely and not get trapped between wallboards.
You can find the best through the wall air conditioner units here. On that page, we explain how to get the right size unit for your needs so you can save the most amount of money on the initial purchase and on your monthly electricity bill.
Getting the Right Size Window Air Conditioner
Now that you know how to install a window air conditioner successfully, it’s also a good idea to confirm that you have the right size air appliance for the room you want to use it in.
Like with any appliance, window AC units come in a variety of sizes.
And the cooling capacity for these air conditioners is determined by the unit’s BTU (British Thermal Unit).
BTU numbers tell you how much energy your cooling system uses to cool down a room. The larger the number, the more space the window air conditioner can cool.
This is why measuring a room before purchasing a window air conditioner is important.
If you install a window AC unit that is too powerful for the room that it’s placed in, the appliance will be overworked. On the other hand, if you install one that’s too weak for the space then it will run too often.
Both of those situations will raise your energy bill more than usual, so it’s best to get the proper size unit for each size room.
To do that, all you have to do is measure a room’s square footage.
Square footage (sq. ft.) is calculated by multiplying the width x length of a room (in feet).
For example, a 10′ x 20′ room = 200 sq. ft.
Once you have the total square footage for the room, you can select a window air conditioner that has the corresponding BTU number.
The chart below can help.
Square Footage to BTU Chart
| Room Size (Square Feet) | Capacity Needed (BTU) |
|---|---|
| 100 up to 150 sq. ft. | 5,000 BTU |
| 150 up to 250 sq. ft. | 6,000 BTU |
| 250 up to 300 sq. ft. | 7,000 BTU |
| 300 up to 350 sq. ft. | 8,000 BTU |
| 350 up to 400 sq. ft. | 9,000 BTU |
| 400 up to 450 sq. ft. | 10,000 BTU |
| 450 up to 550 sq. ft. | 12,000 BTU |
| 550 up to 700 sq. ft. | 14,000 BTU |
Enjoy Your New Window Air Conditioner
We hope this guide on how to install a window air conditioner was helpful.
As you learned, there are a variety of ways for how to install window AC units in any house. No matter if you have double-hung, casement, or sliding windows, there’s a solution to make things work. You can even install an air conditioner in a wall if you need it; however, you just need to make sure it’s the right kind of appliance for that application.
Regardless of the installation process you choose or the type of air conditioner you buy, we’re sure that you’ll enjoy the cooling comfort that these devices provide.